Get video grading like a pro with RAW and LOG footage
RAW and LOG footage are the keys to creating your own cinematic masterpieces. Dom Salmon removes the mystery surrounding these file types
Previously, we dealt with the fundamentals of colour grading for video, but only for the in-camera ‘native’ footage that your Nikon mirrorless produces. I’m hopeful it demonstrated that even the subtlest of grading tweaks can add life to poor video, make good video great and even help create a mood and style in your narrative.
It’s often all you need. I love Nikon’s colour science. Eight times out of ten, ‘in camera’ is very close to final image and Nikon’s Picture Control gives you a lot of further stylistic ‘flavours’ you can simply dial in with one click. If you have a Nikon Z50II, Z5II, Z6III or Zf you can also use a growing selection of ‘recipes’ from Nikon Imaging Cloud.
But what if you have a unique creative vision, or you want to give yourself as much room to manoeuvre creatively later? That’s when the video menu gets called up and you reach for RAW and/or LOG options.
These formats, now standard for filmmakers and enthusiasts alike, provide unparalleled creative control, allowing you to shape your visual storytelling in post-production. But first, as ever, a key question… what exactly are RAW and LOG footage?
If standard ‘native’ footage is a ready meal – just pop it in the oven and it’s done – RAW and LOG footage are the raw ingredients: unprocessed, untouched and ready for your own culinary skills.
RAW files capture all the information from a camera’s sensor, but don’t do any further processing to it, giving you maximum flexibility to adjust settings – such as White Balance, exposure and colour in post-production. If you like maximum precision, full quality and no detail left behind, RAW is an awesome option.
LOG footage, on the other hand, is a more processed format designed to retain a wide dynamic range by using a logarithmic tone curve (hence the name). Don’t worry about the maths aspect of that, it just means that a) it doesn’t carry the same amount of data as RAW and b) it delivers a flatter, desaturated image that is much easier to handle and manipulate in post-production. LOG is ideal for filmmakers who want to balance creative flexibility with manageable file sizes and workflows.
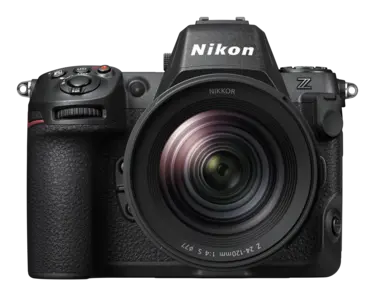
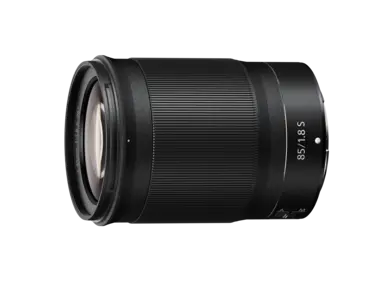
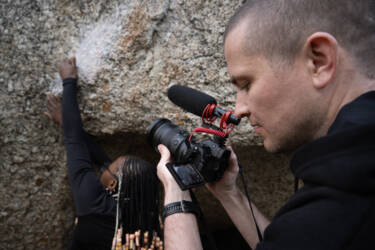
What’s in my kitbag?
Why use RAW or LOG in your work?
Both formats excel in offering dynamic range and flexibility, making them perfect for cinematic projects.
Creative freedom
Both formats let you manipulate colours, shadows, and highlights in ways that standard video simply can’t. You can really push these formats far more than native footage, which has a lot of settings already ‘baked in’.
Dynamic range
LOG compresses highlights and shadows, making it easier to preserve details in extreme lighting conditions. In video, as with stills, it’s very easy to ‘blow’ your highlights and ‘crunch’ your blacks, i.e. these areas have no information in them so you’ll lose any finer details in those exposure ranges.
Future-proof
Working with these formats means you can revisit them at any time and get back to the basics. Overdid that footage following a particular visual trend? No problem, as RAW and LOG give you a ‘do-over’. Not only can you completely revisit the look, but the quality is still as good as the moment you captured it.
The downsides
Massive files
And I mean huge. RAW files, in particular, can eat up storage quickly, requiring robust hardware for processing. It’s so demanding that your camera may even shut off after a while at high data/frame rates to protect its circuitry.
Learning curve
Starting out, you might find the flat, lifeless appearance of RAW and LOG footage intimidating. Where do you start? (Here, I hope!)
Time-intensive
Grading and editing just takes longer compared to ‘out-of-the-box’ standard footage. I mean you have to do something straight away to it just to make it look ‘normal’. A pain, right?
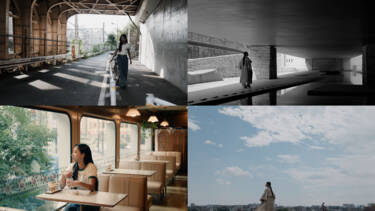
From left to right: Achromic, Film Bias, Film Bias Bleach Bypass, Film Bias Offset, no LUTs
Using LUTs as cheat codes
So, how do we make these weedy, bland files IMAX-worthy? Fortunately, there’s a shortcut to instantly improving them: LUTS. LUTs (look-up tables) are pre-configured colour settings designed to transform flat footage into a vibrant, finished product.
If I want to change my N-Log into graded footage in Final Cut, I simply drop the clip on my timeline, drag the ‘Custom LUT’ effect in the Effects Browser onto it, choose the LUT designed for Nikon’s N-LOG profile to ensure colour accuracy and…boom.
To get started there are exclusive (and free!) LUTs from Nikon and RED for you to try out.
These LUTs are designed to work perfectly with your Nikon RAW and LOG footage and get cinematic results in an instant. Download them here.
Achromic
A much softer black and white vibe than our Nosferatu tribute style. Great for preserving detail and having a gentle, artistic feel.
Film Bias
A classic filmic look, this is a nice LUT to keep skin tones very flattering, warm and natural-looking. A great alternative to a lot of the more extreme grading looks currently on trend.
Film Bias Bleach Bypass
Very dramatic and full of punch. A little warmer, softer than my more green/cyan Private Ryan approach above, but gives an immediate grit, realism and impact to footage. Great to add a little ‘edge’ to your movie.
Film Bias Offset
A little more of a vintage spin on the basic Film Bias LUT, this further brings out warm tones (especially in skin) in a way that’s noticeable but natural. It’s also great for a pleasing lift to outdoors and landscapes, adding a sense of haze and space to exterior scenes.
Tool tip: While your LUT is technically 100% correct in how it translates your footage, you can still tweak it further to suit your scene. I always look to grab Final Cut’s handy ‘MIX’ tool to vary the strength of the LUT on my footage. If it all looks a bit bright and ‘spikey’, backing it off a tad to, say, 75% will make it look more natural.
Manually crafting a cinematic look
LUTs simplify the grading process, giving you a professional-looking base to build upon. However, to truly master cinematic grading, it’s time to roll up your sleeves and do some manual labour. Creating your own grade is where artistry meets technical skill and, with apps such as Adobe Premier, DaVinci Resolve and Final Cut Pro, you can take full control of your footage to get a look that’s unique to you and your creative vision.
With these more detailed formats, you can push your video into powerful creative territory. So let’s look to create some cinema-centric looks with our RAW/LOG footage.
Saving Private Ryan – Omaha Beach D-Day Landing
Click the button to play

Bleach bypass
Inspired by a classic slide-film darkroom technique, bleach bypass adds grit and drama to footage. Cinematographer Janusz Kamiński, DoP genius and long-time collaborator of Spielberg, is famed for this look, which reached its creative peak on the Oscar-scooping Saving Private Ryan.
Originating in film, this look was created by skipping the bleach part of the film’s processing, meaning more silver was left in the negative at the expense of the colour dyes. This led to a desaturated and grainy look, at times almost monochromatic. It’s also very contrasty. In short, technically it’s 100% ‘wrong’, but it creates a hugely powerful look that can significantly influence the audience’s emotional engagement. Check out Saving Private Ryan’s opening beach landing sequence. It wouldn’t have the same nightmarish and claustrophobic feel in bright, sunshine colours. The Nikon/RED version of this LUT is a great place to start.
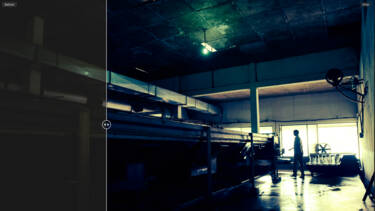
Bleach bypass. In this very dark tea processing plant, getting any detail into the shadows meant being willing to blow my highlights completely. This high contrast look leant itself to a bleach-bypass style grading. The addition to a slightly ‘sickly’ green cast further enhances this effect.
Look tip: Desaturate the overall image slightly and then boost its contrast significantly. Don’t be afraid to blow your highlights to pure white. Add a faint green, almost ‘sickly’ tint to shadows for an edgy, atmospheric look, plus add a very light cyan cast to your highlights and midtones. If you have a grain filter, stick that on for good measure, and bingo!
Opening fight scene | Dune: Part Two (2024)
Click the button to play

Sunny side up
To emphasise the hostile, hot and arid nature of the planet Arrakis in the Dune movies, DoP Greig Fraser often created a very ‘Duotone’ (i.e. monochrome with a dominant single colour added) look, usually a huge orange cast over the entire frame.

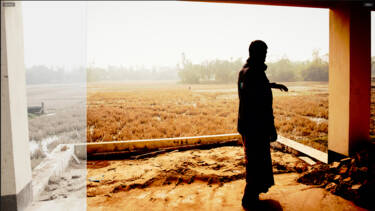
Tone. A very hazy hour with a powerful sun was a great way to concentrate on the silhouette by reducing it to a single golden tone.
Look tip: Choose a colour that you believe has a powerful storytelling element to it and really go for it. Remember that you don’t just lather a colour ‘on’, but that you should also subtract other colours from the frame. For a very powerful orange look, dial back other colours such as greens and blues. It’s often better to treat shadows, mids and highlights separately rather than just reaching for the ‘GLOBAL’ slider. If I feel this is bringing too little depth and contrast to a frame, in the orange example, I might like to pull the shadows down to be very dark and add a little cyan/teal into them to bring some contrast and depth back into the image.
Nosferatu – official trailer
Click the button to play

N-log noir
RAW or LOG is great for creating monochromatic looks as it doesn’t have a lot of superfluous settings such as contrast, saturation from the start, so you’re not fighting to remove grading, you can just add to it.
Look tip: Don’t just turn off your colour! Look to reduce the saturation in different ways across different parts of your image. A recent film I really love is Robert Eggers’ Nosferatu. Cinematographer Jarin Blaschke has created frames that make you think you are watching a black and white movie, but there are still some traces of colour, creating a modern take on a classic cinematic period look. Boosting contrast and grain will help add depth and make it much more analogue and less ‘digital’ looking.
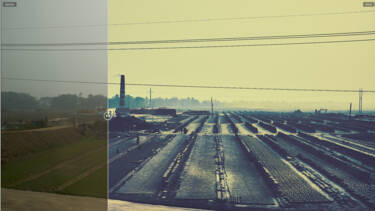
Mono. Not a true monochrome image, but the original landscape was a little flat due to being very overcast midday light, so a crank on contrast and pushing the colour balance into the shadows and highlights created a totally new visual look of a very stark, barren landscape.
Let’s get grading
It’s true that really mastering RAW and LOG footage requires imagination, some technical know-how and not a little patience. However, a touch of spice can bring a real zing to even the dullest dish! It’s not hard to start getting a real crowd-pleasing and personal style.
Ultimately, the flexibility and creativity of RAW and LOG isn’t just a way to help you have more technical control over your work, it’s a way to really push yourself in thinking about creating a visual style, mood and narrative in your work way beyond the presets.
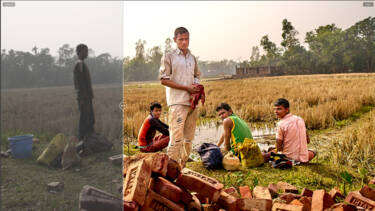
Golden. The ochre tones of the brick foreground and the grass background created a very warm frame. A neutral file format meant I could recover a lot of detail in the faces which would otherwise been lost.
Grading projects to try
Golden hour
When the sun is setting, film a friend outdoors during ‘golden hour’ using N-Log as your base file. In post, focus on balancing skin tones with vibrant backgrounds, looking to grade the footage with a warm, nostalgic look. Find that sweet spot between saturated and overcooked – maybe trying Nikon’s RED Film Offset Bias LUT and then looking to recreate its effect yourself. Add subtle contrast in your LEVELS and shift the midtones a little towards a more golden hue. Then use the GLOBAL saturation control to determine how much of a boost to use.

Vivid. These kids were such fun to be around, and being able to add contrast and saturation to the frame really made their energy shine through.
Cityscape
Capture some footage around a cityscape and look to create something with a strong narrative feel, rather than a simple recording of the location. Again N-Log is a great start as you don’t want much in the way of colour information. Think about dialling down colours in the red range and favouring more cyan tones overall. Then think about how contrast can affect your image. Push it high to create something stark and threatening? Or take it way down to create a bleak and oppressive flattened look? Again A/B your grade ideas against RED’s Bleach Bypass LUT to see what kind of drama your grade is adding.

Urban. Whilst being an amazing setting, the darkness of this city setting was a bit ‘meh’. Using “the force”, I turned the colour off and pushed it as hard as I can into extreme mono. A lot less ‘tourist phone footage’!
Movement in sunshine
Capture some fun activity (sports, a birthday party – anything with a lot of moving subjects is great) in bright outdoor settings and look to RAW footage for its amazing detail retention as a foundation to boost the energy and vibe of your frame. In contrast to the previous challenge, adding saturation and contrast can really make the most of RAW – boosting colours and sharpness, adding a real positivity and vibrance to your story.
More in software and colour grading
Discover the Nikon Z5II

Unlock greater creativity

